
Sunday Loaf
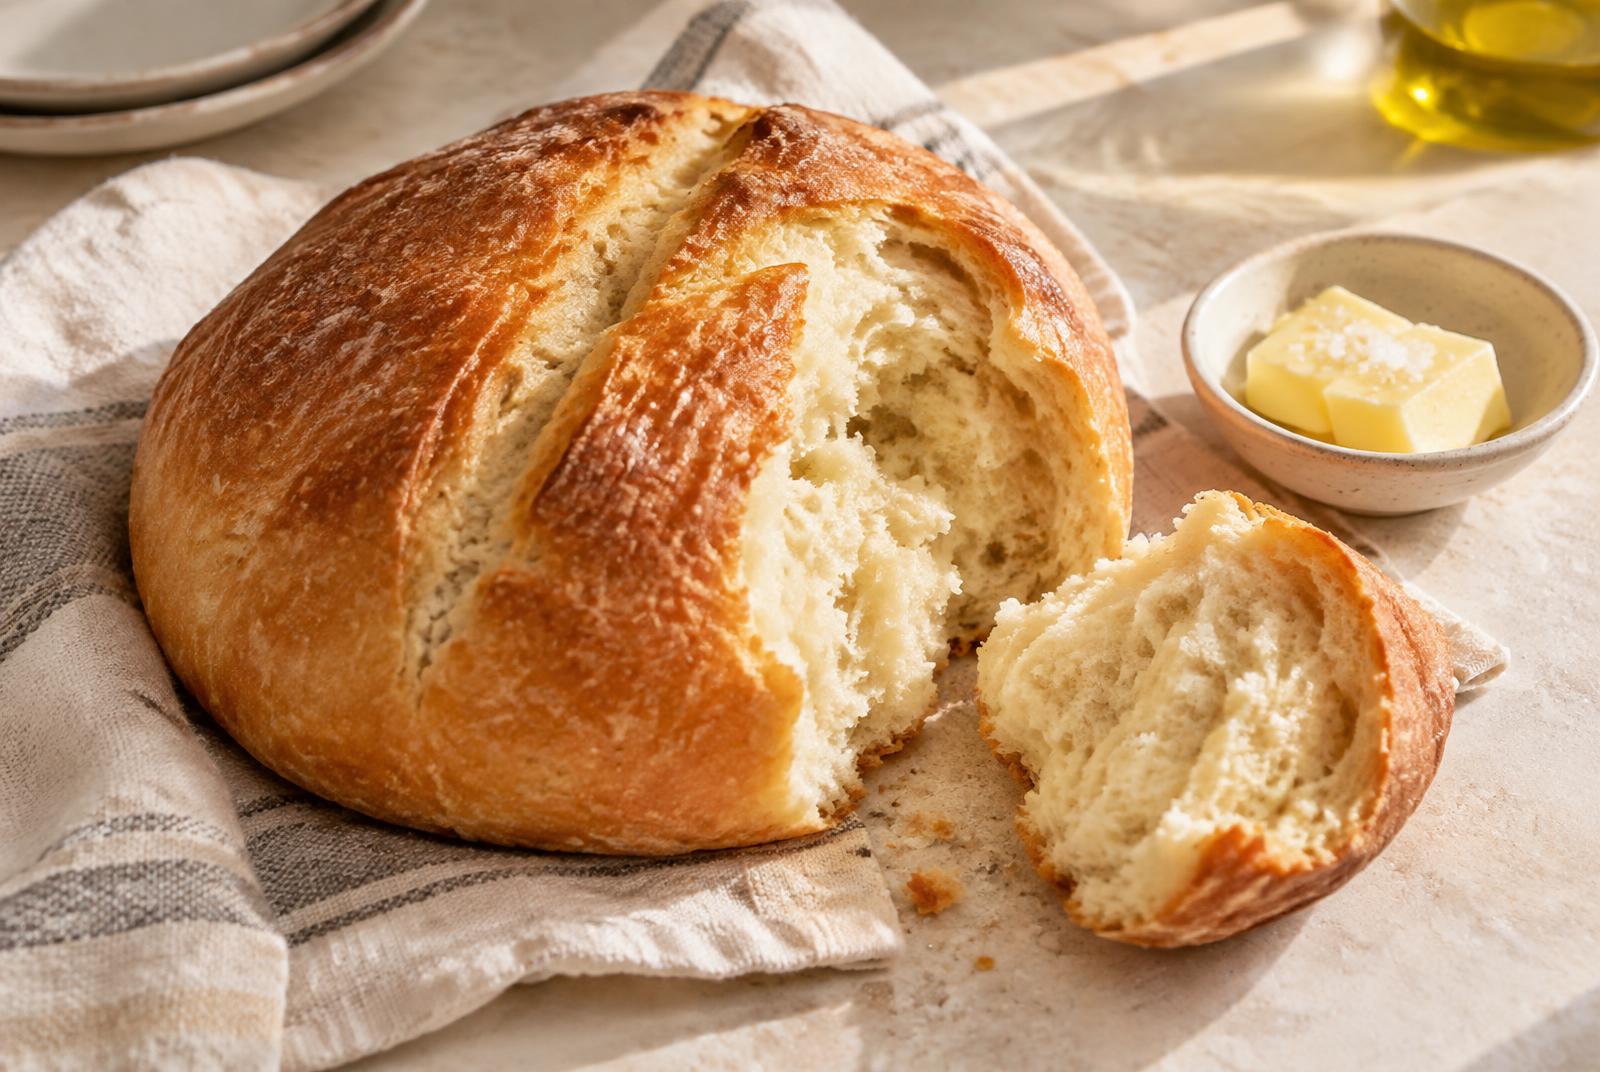
A simple olive-oil bread with a golden crust and soft, tearable center.
Every house deserves a bread recipe.
Not the impressive one you make twice a year. The one you know well enough to begin without thinking too hard about it.
This is that loaf.
A handful of ordinary ingredients, a little time, and the kind of crust that makes everyone tear off a piece before dinner reaches the table.
Make it on Sunday. Make it on Tuesday.
Eventually, just make it yours.
- Prep
- 20 minutes
- Rise
- About 2 hours
- Bake
- 30–35 minutes
- Makes
- 1 loaf
What You'll Need
For the Loaf
- 3 1/4 cups (390g) all-purpose flour
- 1 1/2 teaspoons instant yeast
- 1 1/2 teaspoons fine sea salt
- 1 1/3 cups (315g) warm water
- 2 tablespoons extra-virgin olive oil
- Additional flour, only as needed for shaping
For Finishing
- Extra-virgin olive oil, for the bowl and loaf
- Flaky sea salt, optional
The Simple Method
Make the Dough
In a large bowl, whisk together the flour, instant yeast and salt.
Add the warm water and olive oil.
Stir with a wooden spoon or sturdy spatula until no dry pockets of flour remain.
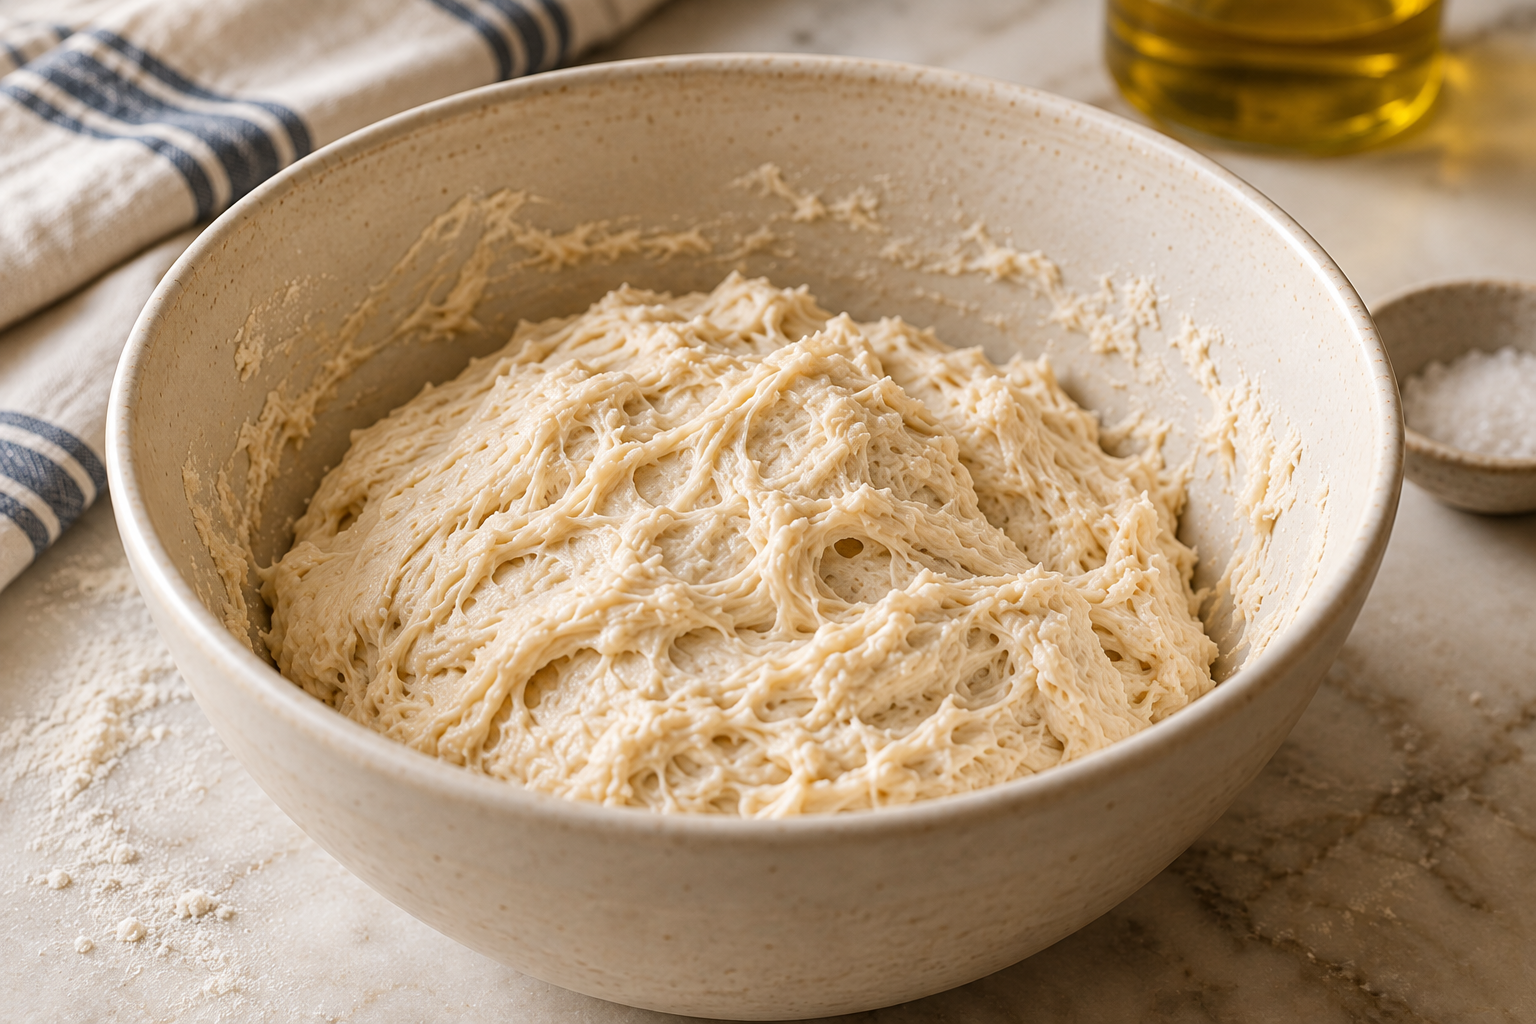
The dough will look shaggy, soft and sticky.
Do not add extra flour simply because the dough feels wetter than a traditional kneaded bread dough.
Let It Rest
Cover the bowl and let the dough rest for 20 minutes.
This short rest gives the flour time to absorb the water and makes the dough easier to work with.
Fold, Don't Knead
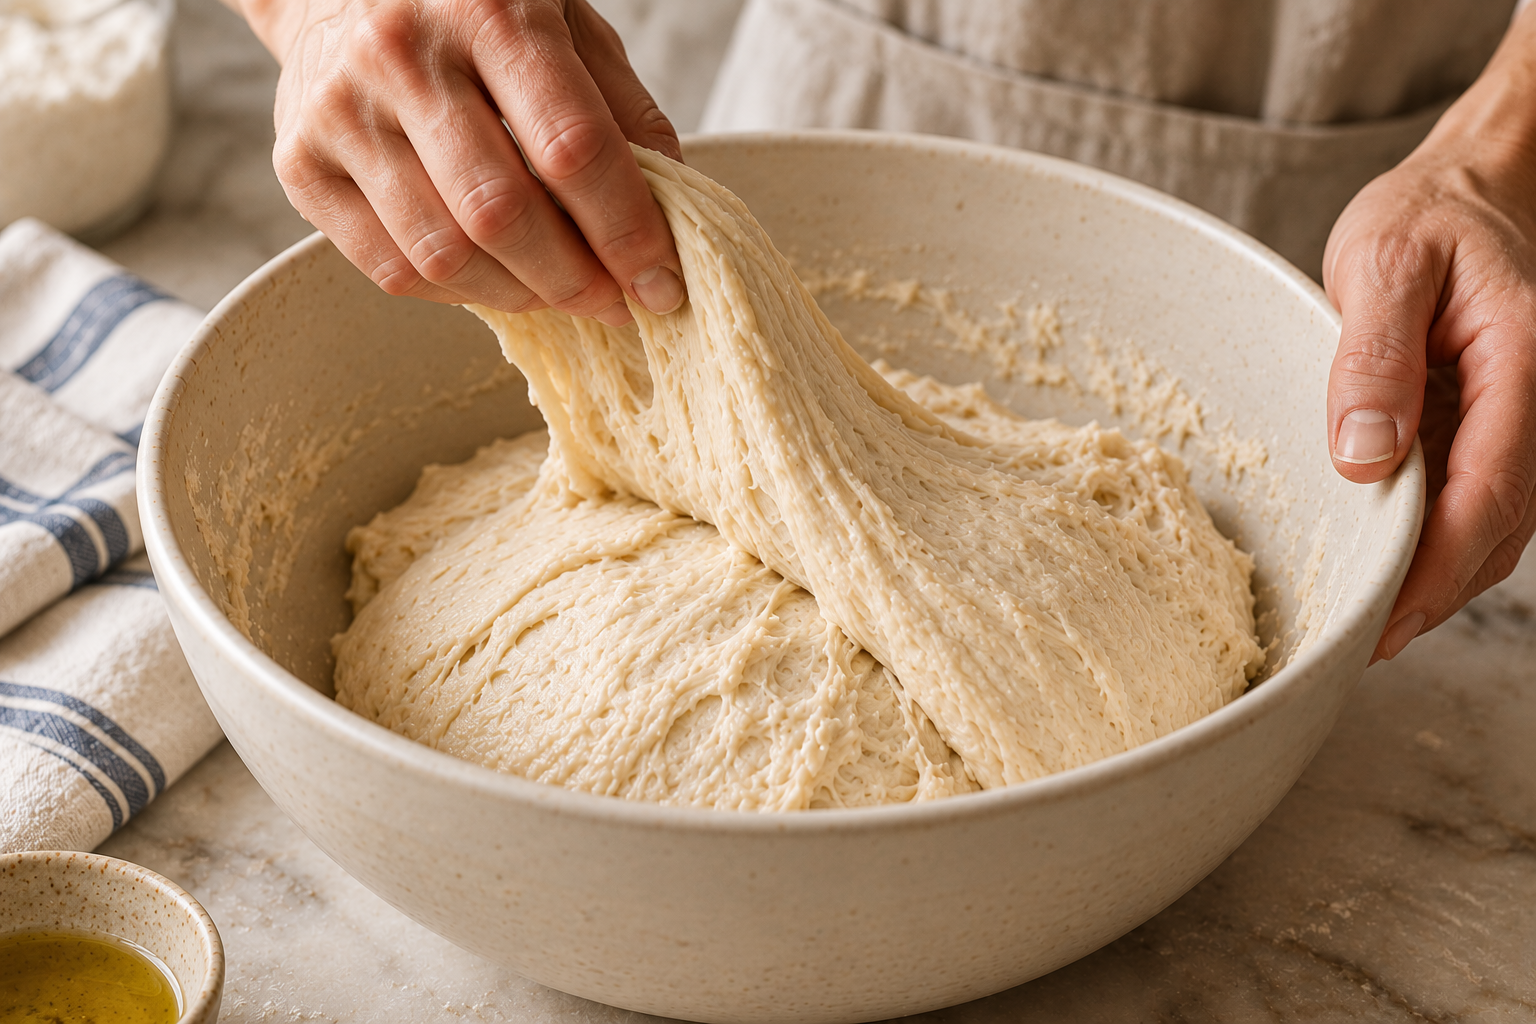
Wet your hand lightly.
Reach under one side of the dough, gently stretch it upward and fold it over the center.
Turn the bowl a quarter turn and repeat.
Continue until you have made four folds around the bowl.
Cover and rest for 20 minutes.
Repeat this folding process one more time.
Let It Rise
Lightly coat the dough and bowl with a little olive oil.
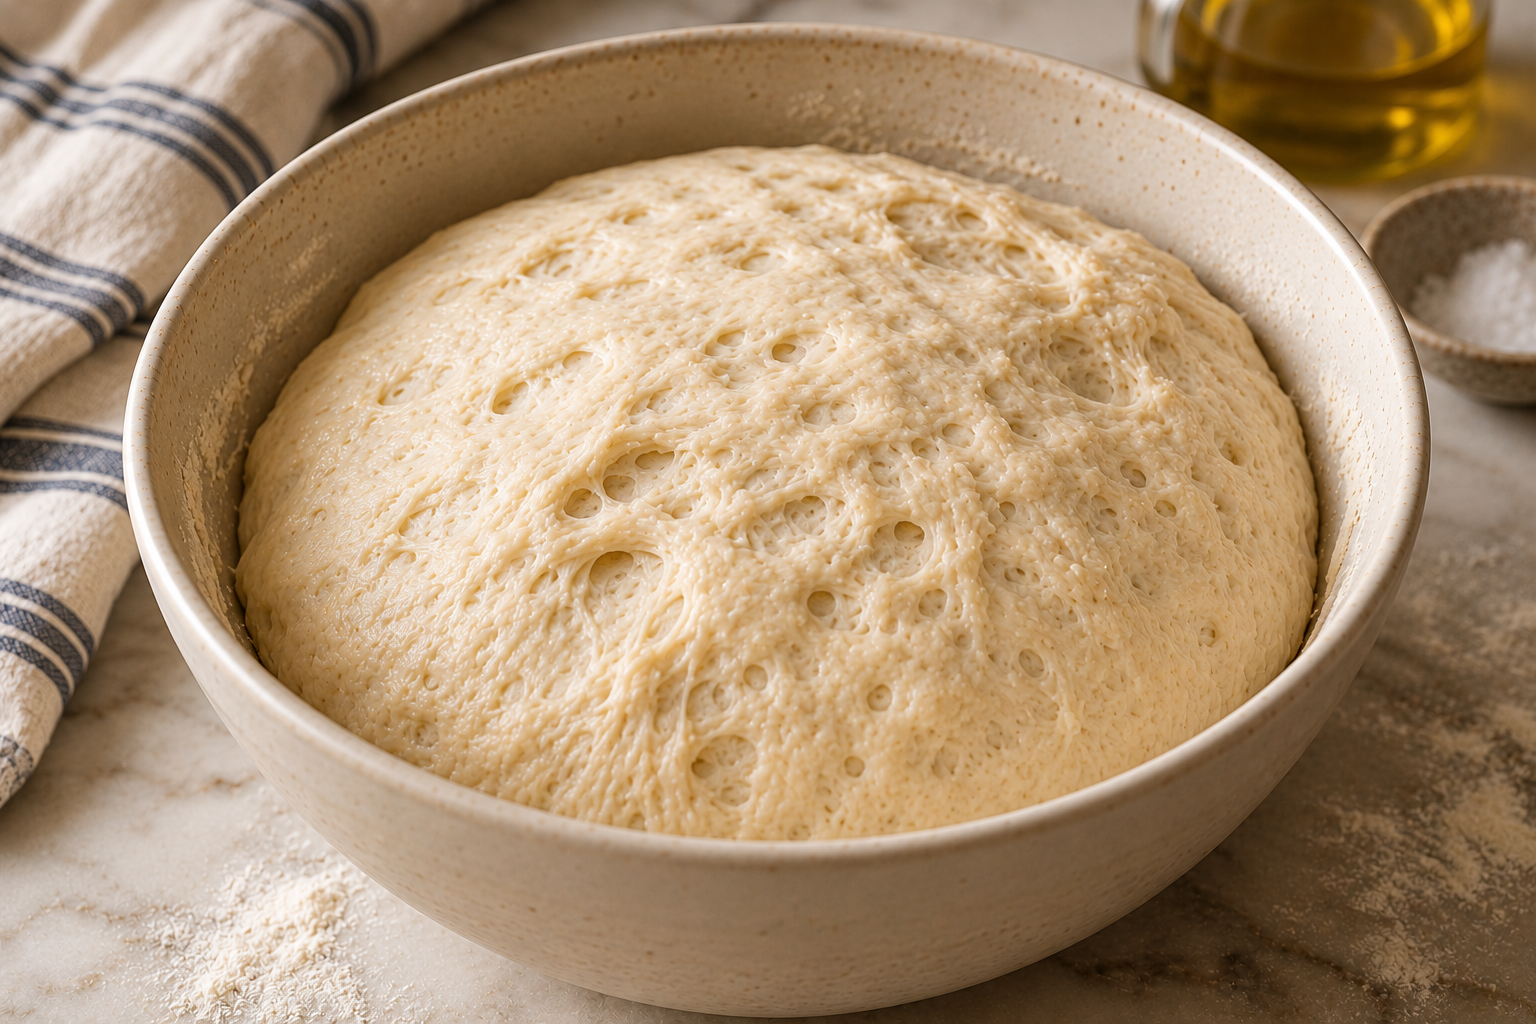
Cover and leave in a comfortably warm part of the kitchen until the dough is noticeably puffy and roughly doubled in size.
This will usually take about 60–90 minutes, but watch the dough rather than the clock.
You should see air developing beneath the surface.
Shape It Gently
Turn the dough onto a very lightly floured surface.
With lightly floured or damp hands, gently draw the edges toward the center to create a loose round.
Turn the loaf seam-side down and gently tuck the edges underneath until the surface has a little tension.
Do not press out all the air you just created.
Let It Puff Again
Transfer the shaped loaf to parchment paper.
Cover loosely and let it rest for about 30–40 minutes, until it looks visibly fuller and slightly springy.
Meanwhile, heat the oven to 425°F.
Get It Ready for the Oven
Brush or rub the top very lightly with olive oil.
Using a very sharp knife or bread lame, make one confident slash across the top of the loaf.
Add a very small amount of flaky sea salt if desired.
Bake Until Deeply Golden
Bake for 30–35 minutes, until the loaf is deeply golden and sounds hollow when tapped underneath.
If using an instant-read thermometer, the center should be about 200–205°F.
Let It Cool
Transfer the loaf to a rack.
Let it cool for at least 30 minutes before slicing.
It will smell like you should ignore this instruction.
Try not to.
A Few Things That Make This Easier
The Dough Should Look Like This
The dough will look shaggy and feel sticky.
That's exactly what we want.
Resist the urge to add more flour just to make it easier to handle. A hydrated dough is part of what gives this loaf its soft center and beautiful crust.
If it sticks to your hands, wet them lightly instead.
Fold, Don't Knead
You don't need to stand at the counter kneading this for ten minutes.
With a damp hand, lift one side of the dough, stretch it gently and fold it toward the center.
Turn the bowl and repeat.
Those few simple folds help the dough build strength while doing most of the work for you.
Let the Dough Tell You
Rise times are useful. The dough is more useful.
After the first rise, look for dough that is noticeably puffy, roughly doubled in size and showing bubbles beneath the surface.
A cool kitchen may take longer. A warm kitchen may move faster.
When it looks like this, it's ready.
Don't Chase a Perfect Round
This is a house loaf, not a bread competition. Give it enough shape to hold itself together and leave it alone.
Use the Clock as a Guide
Bread rises on its own schedule. Kitchen temperature, water temperature and even the weather can change how quickly the dough moves.
Let It Cool
The inside of the loaf is still setting when it comes out of the oven. Thirty minutes on the rack will give you a better crumb when you slice it.
Tomorrow Morning
If there's any left, toast a thick slice and add salted butter. Sunday Loaf is very good on Monday.
It's the first piece torn from the loaf.
Usually while it's still a little warmer than it should be.
Someone reaches for the butter. Someone else tears off another piece. And suddenly the bread you spent most of the day barely paying attention to is disappearing from the table.
That's when it becomes Sunday Loaf.
You don't need to become someone who bakes bread.
You just need one loaf you know how to make.
Make this one enough times and eventually you'll stop checking the recipe quite so often.
Every house deserves a bread recipe.
More from the Kitchen

Hidden & Seen HS
Sunday Loaf
A simple olive-oil bread with a golden crust and soft, tearable center.
- Prep
- 20 minutes
- Rise
- About 2 hours
- Bake
- 30–35 minutes
- Makes
- 1 loaf
What You'll Need
For the Loaf
- 3 1/4 cups (390g) all-purpose flour
- 1 1/2 teaspoons instant yeast
- 1 1/2 teaspoons fine sea salt
- 1 1/3 cups (315g) warm water
- 2 tablespoons extra-virgin olive oil
- Additional flour, only as needed for shaping
For Finishing
- Extra-virgin olive oil, for the bowl and loaf
- Flaky sea salt, optional
The Simple Method
Make the Dough
In a large bowl, whisk together the flour, instant yeast and salt.
Add the warm water and olive oil.
Stir with a wooden spoon or sturdy spatula until no dry pockets of flour remain.
The dough will look shaggy, soft and sticky.
Do not add extra flour simply because the dough feels wetter than a traditional kneaded bread dough.
Let It Rest
Cover the bowl and let the dough rest for 20 minutes.
This short rest gives the flour time to absorb the water and makes the dough easier to work with.
Fold, Don't Knead
Wet your hand lightly.
Reach under one side of the dough, gently stretch it upward and fold it over the center.
Turn the bowl a quarter turn and repeat.
Continue until you have made four folds around the bowl.
Cover and rest for 20 minutes.
Repeat this folding process one more time.
Let It Rise
Lightly coat the dough and bowl with a little olive oil.
Cover and leave in a comfortably warm part of the kitchen until the dough is noticeably puffy and roughly doubled in size.
This will usually take about 60–90 minutes, but watch the dough rather than the clock.
You should see air developing beneath the surface.
Shape It Gently
Turn the dough onto a very lightly floured surface.
With lightly floured or damp hands, gently draw the edges toward the center to create a loose round.
Turn the loaf seam-side down and gently tuck the edges underneath until the surface has a little tension.
Do not press out all the air you just created.
Let It Puff Again
Transfer the shaped loaf to parchment paper.
Cover loosely and let it rest for about 30–40 minutes, until it looks visibly fuller and slightly springy.
Meanwhile, heat the oven to 425°F.
Get It Ready for the Oven
Brush or rub the top very lightly with olive oil.
Using a very sharp knife or bread lame, make one confident slash across the top of the loaf.
Add a very small amount of flaky sea salt if desired.
Bake Until Deeply Golden
Bake for 30–35 minutes, until the loaf is deeply golden and sounds hollow when tapped underneath.
If using an instant-read thermometer, the center should be about 200–205°F.
Let It Cool
Transfer the loaf to a rack.
Let it cool for at least 30 minutes before slicing.
It will smell like you should ignore this instruction.
Try not to.
A Few Things That Make This Easier
The Dough Should Look Like This
The dough will look shaggy and feel sticky. That's exactly what we want. Resist the urge to add more flour just to make it easier to handle. A hydrated dough is part of what gives this loaf its soft center and beautiful crust. If it sticks to your hands, wet them lightly instead.
Fold, Don't Knead
You don't need to stand at the counter kneading this for ten minutes. With a damp hand, lift one side of the dough, stretch it gently and fold it toward the center. Turn the bowl and repeat. Those few simple folds help the dough build strength while doing most of the work for you.
Let the Dough Tell You
Rise times are useful. The dough is more useful. After the first rise, look for dough that is noticeably puffy, roughly doubled in size and showing bubbles beneath the surface. A cool kitchen may take longer. A warm kitchen may move faster. When it looks like this, it's ready.
Don't Chase a Perfect Round
This is a house loaf, not a bread competition. Give it enough shape to hold itself together and leave it alone.
Use the Clock as a Guide
Bread rises on its own schedule. Kitchen temperature, water temperature and even the weather can change how quickly the dough moves.
Let It Cool
The inside of the loaf is still setting when it comes out of the oven. Thirty minutes on the rack will give you a better crumb when you slice it.
Tomorrow Morning
If there's any left, toast a thick slice and add salted butter. Sunday Loaf is very good on Monday.